Skip to content
Gardenly3D

Garden Terrain Modelling

Design the garden with the ground in mind

Model existing terrain, develop proposed levels and explore slopes and indicative runoff. Keep planting, paths and structures in the same garden context.

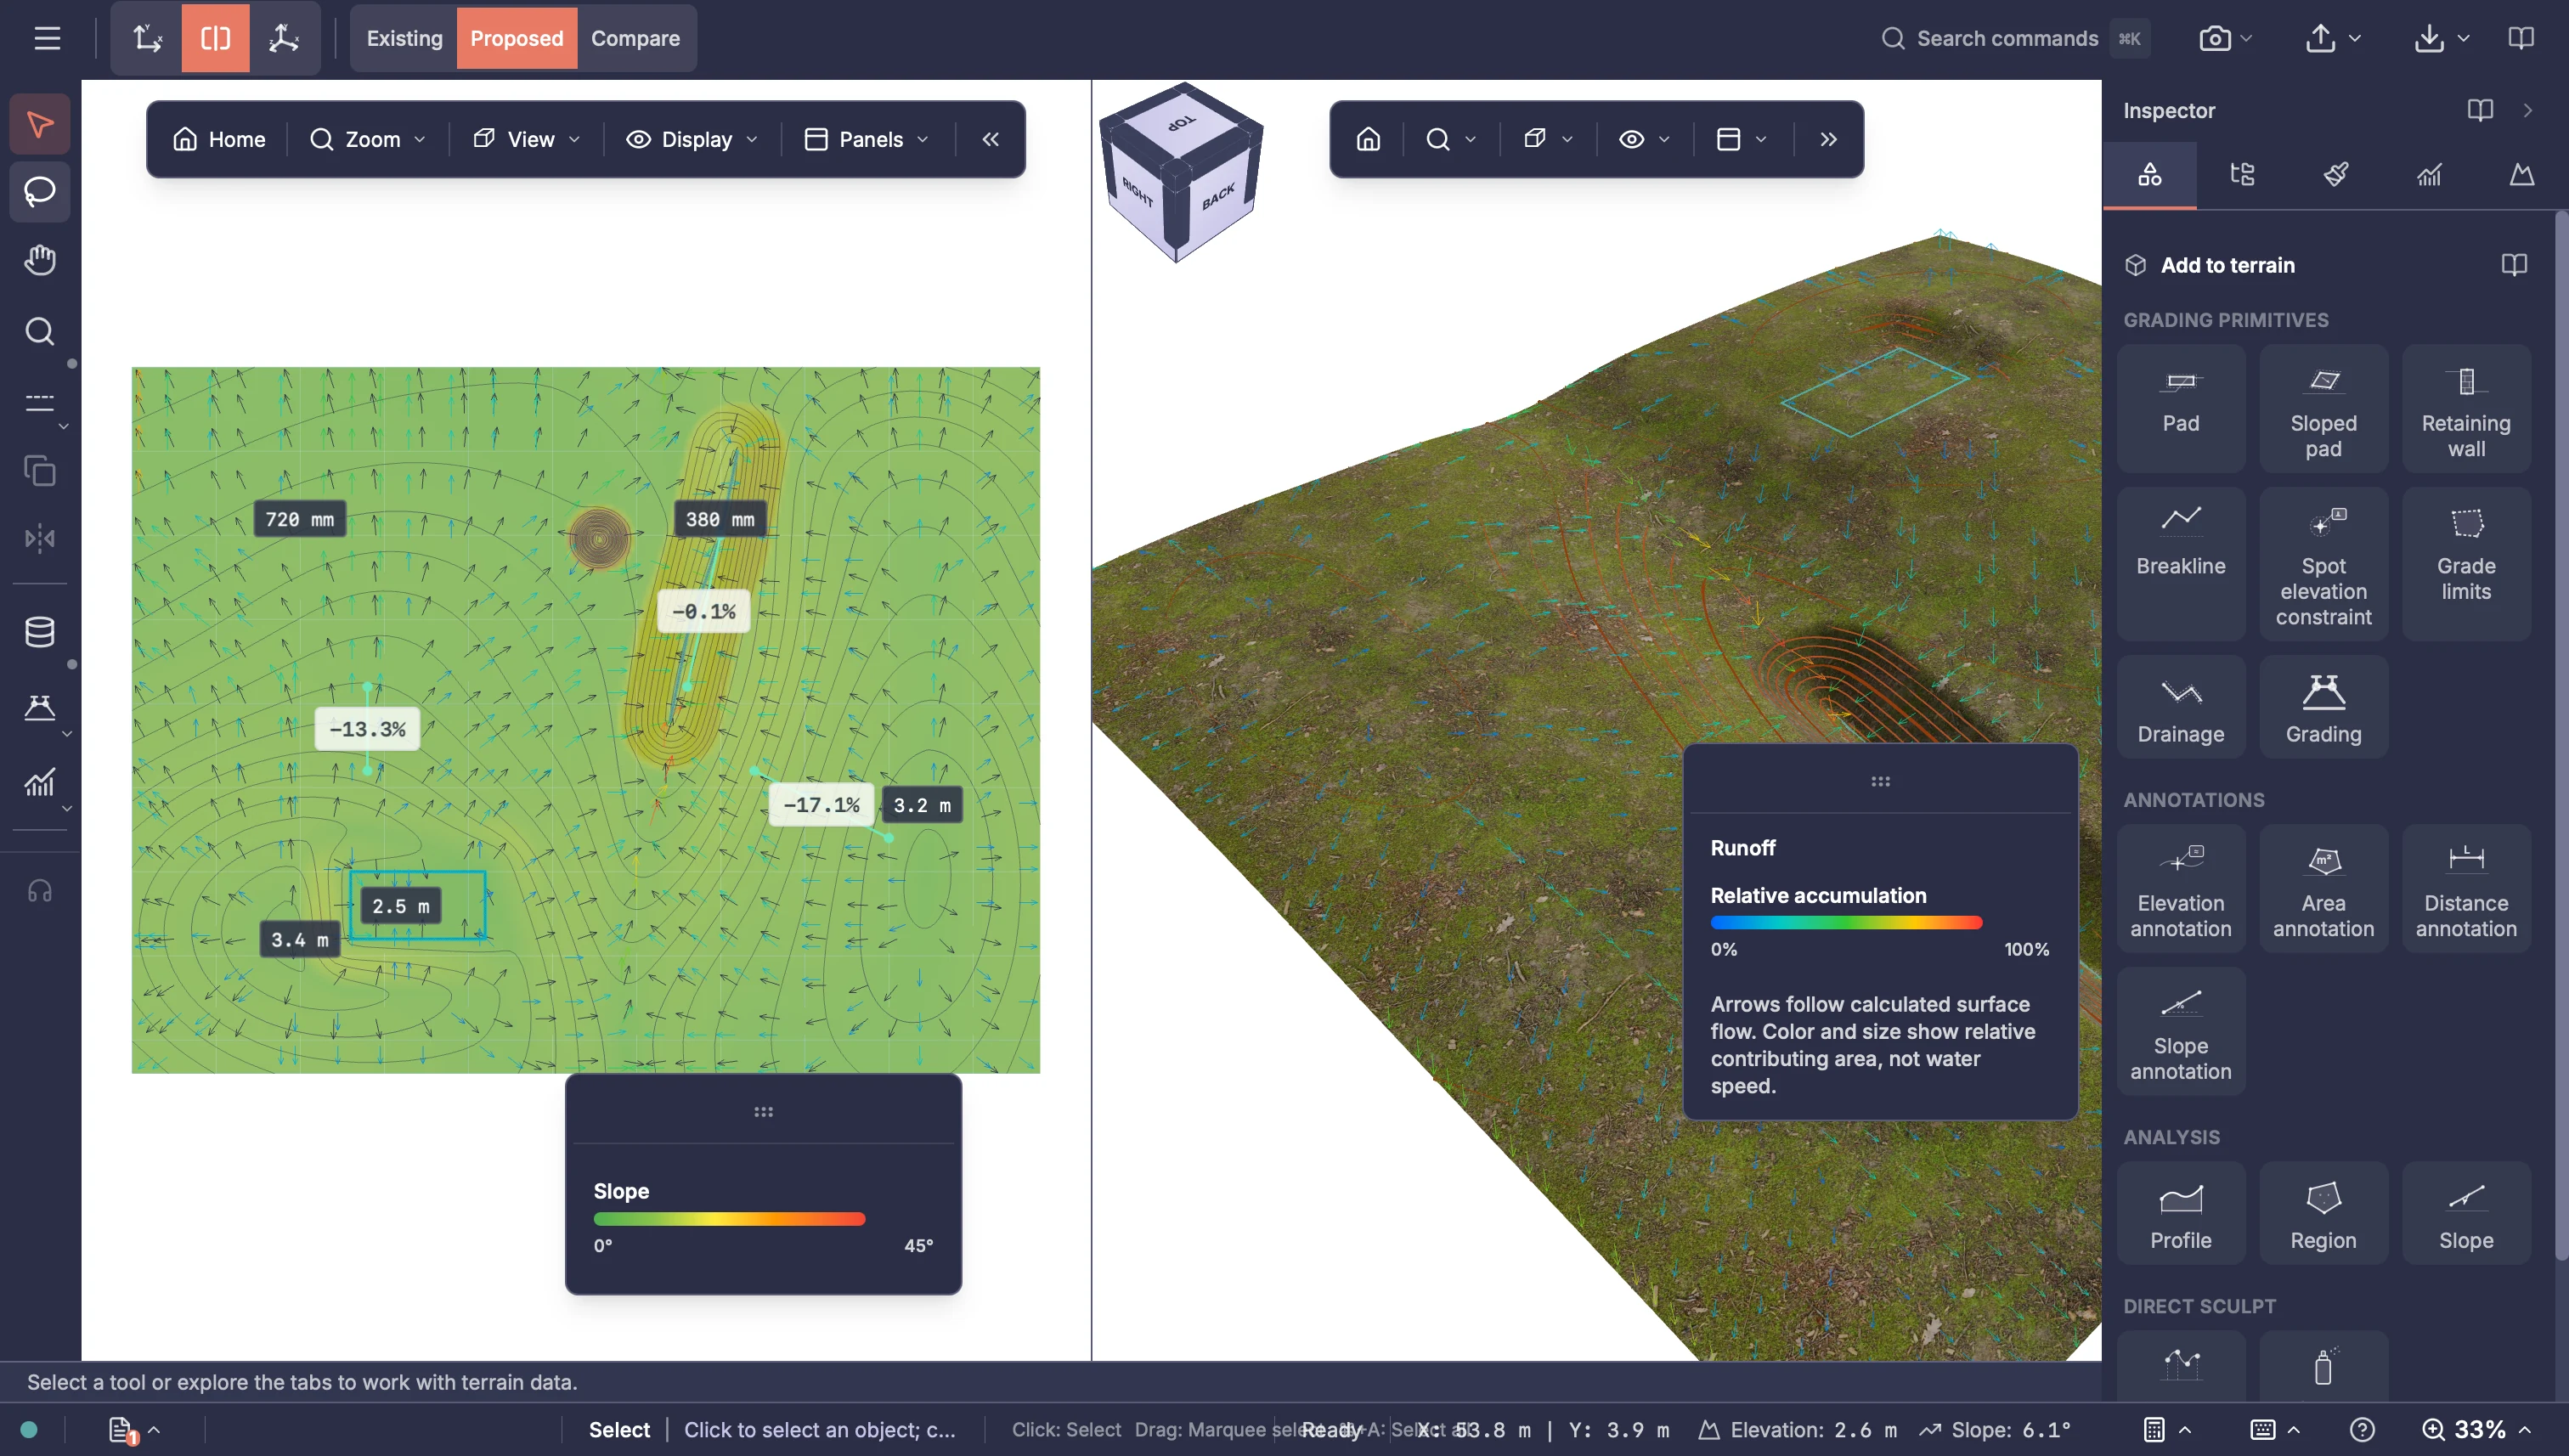
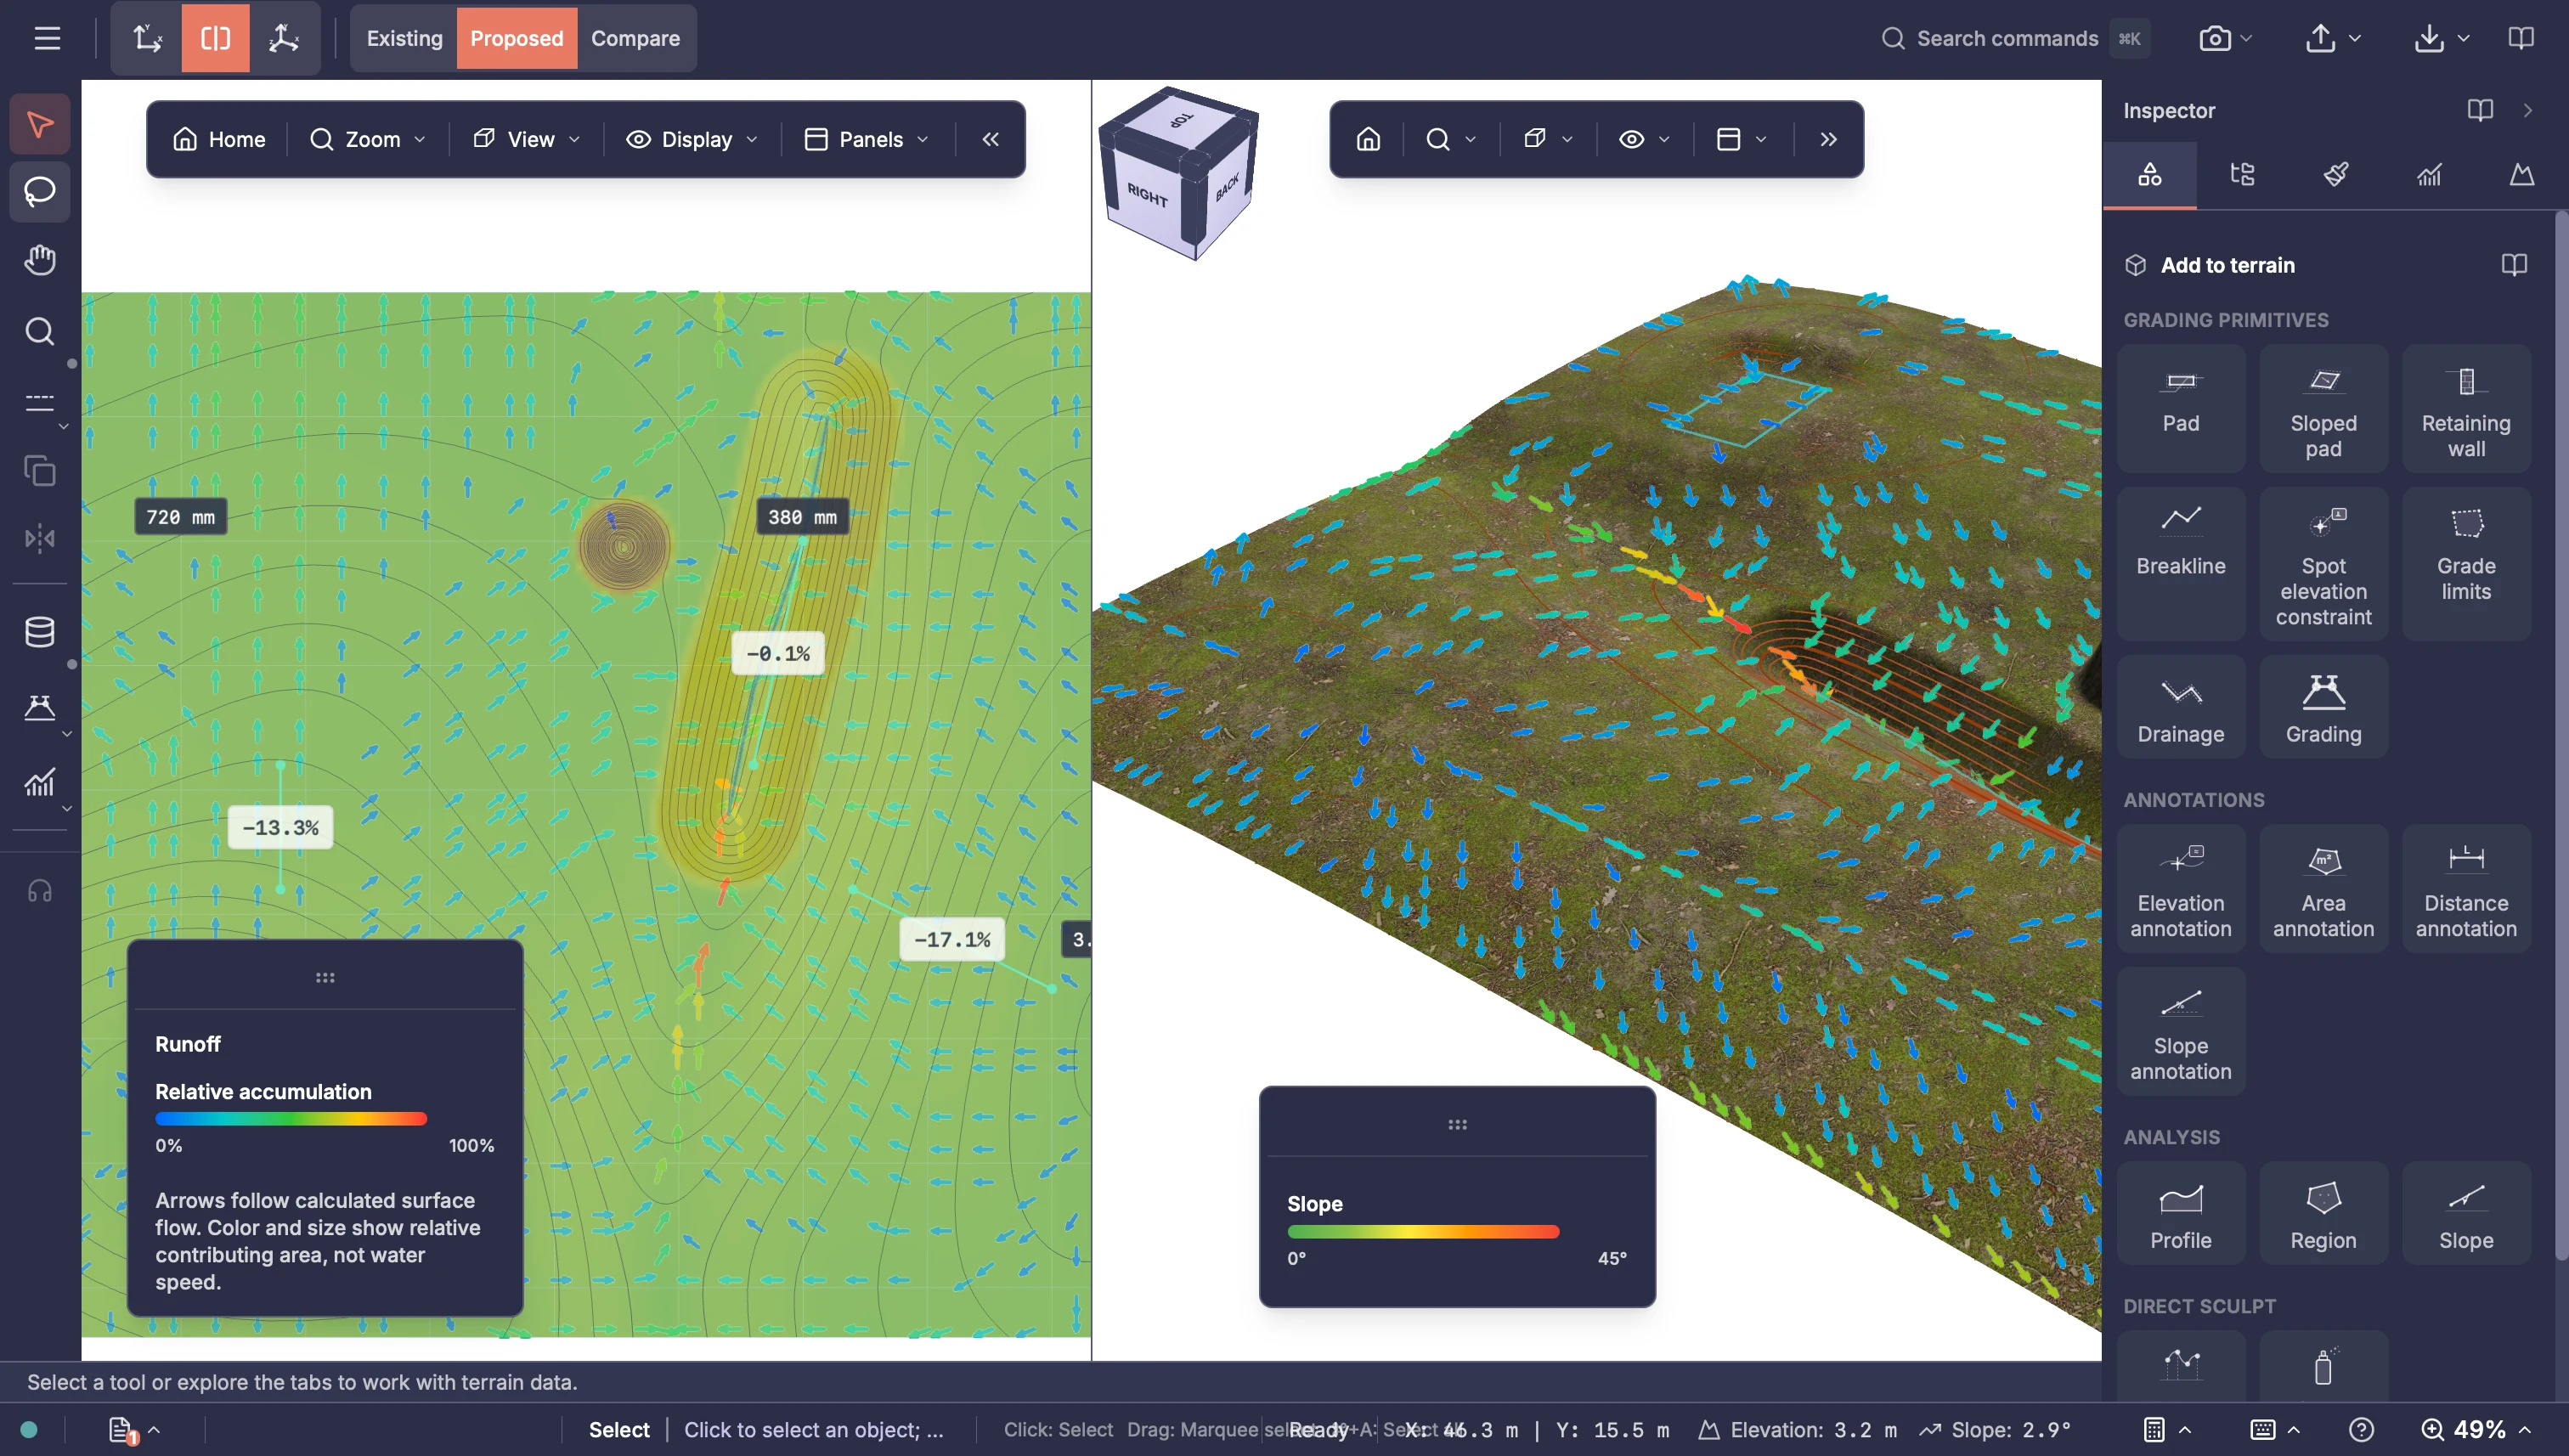
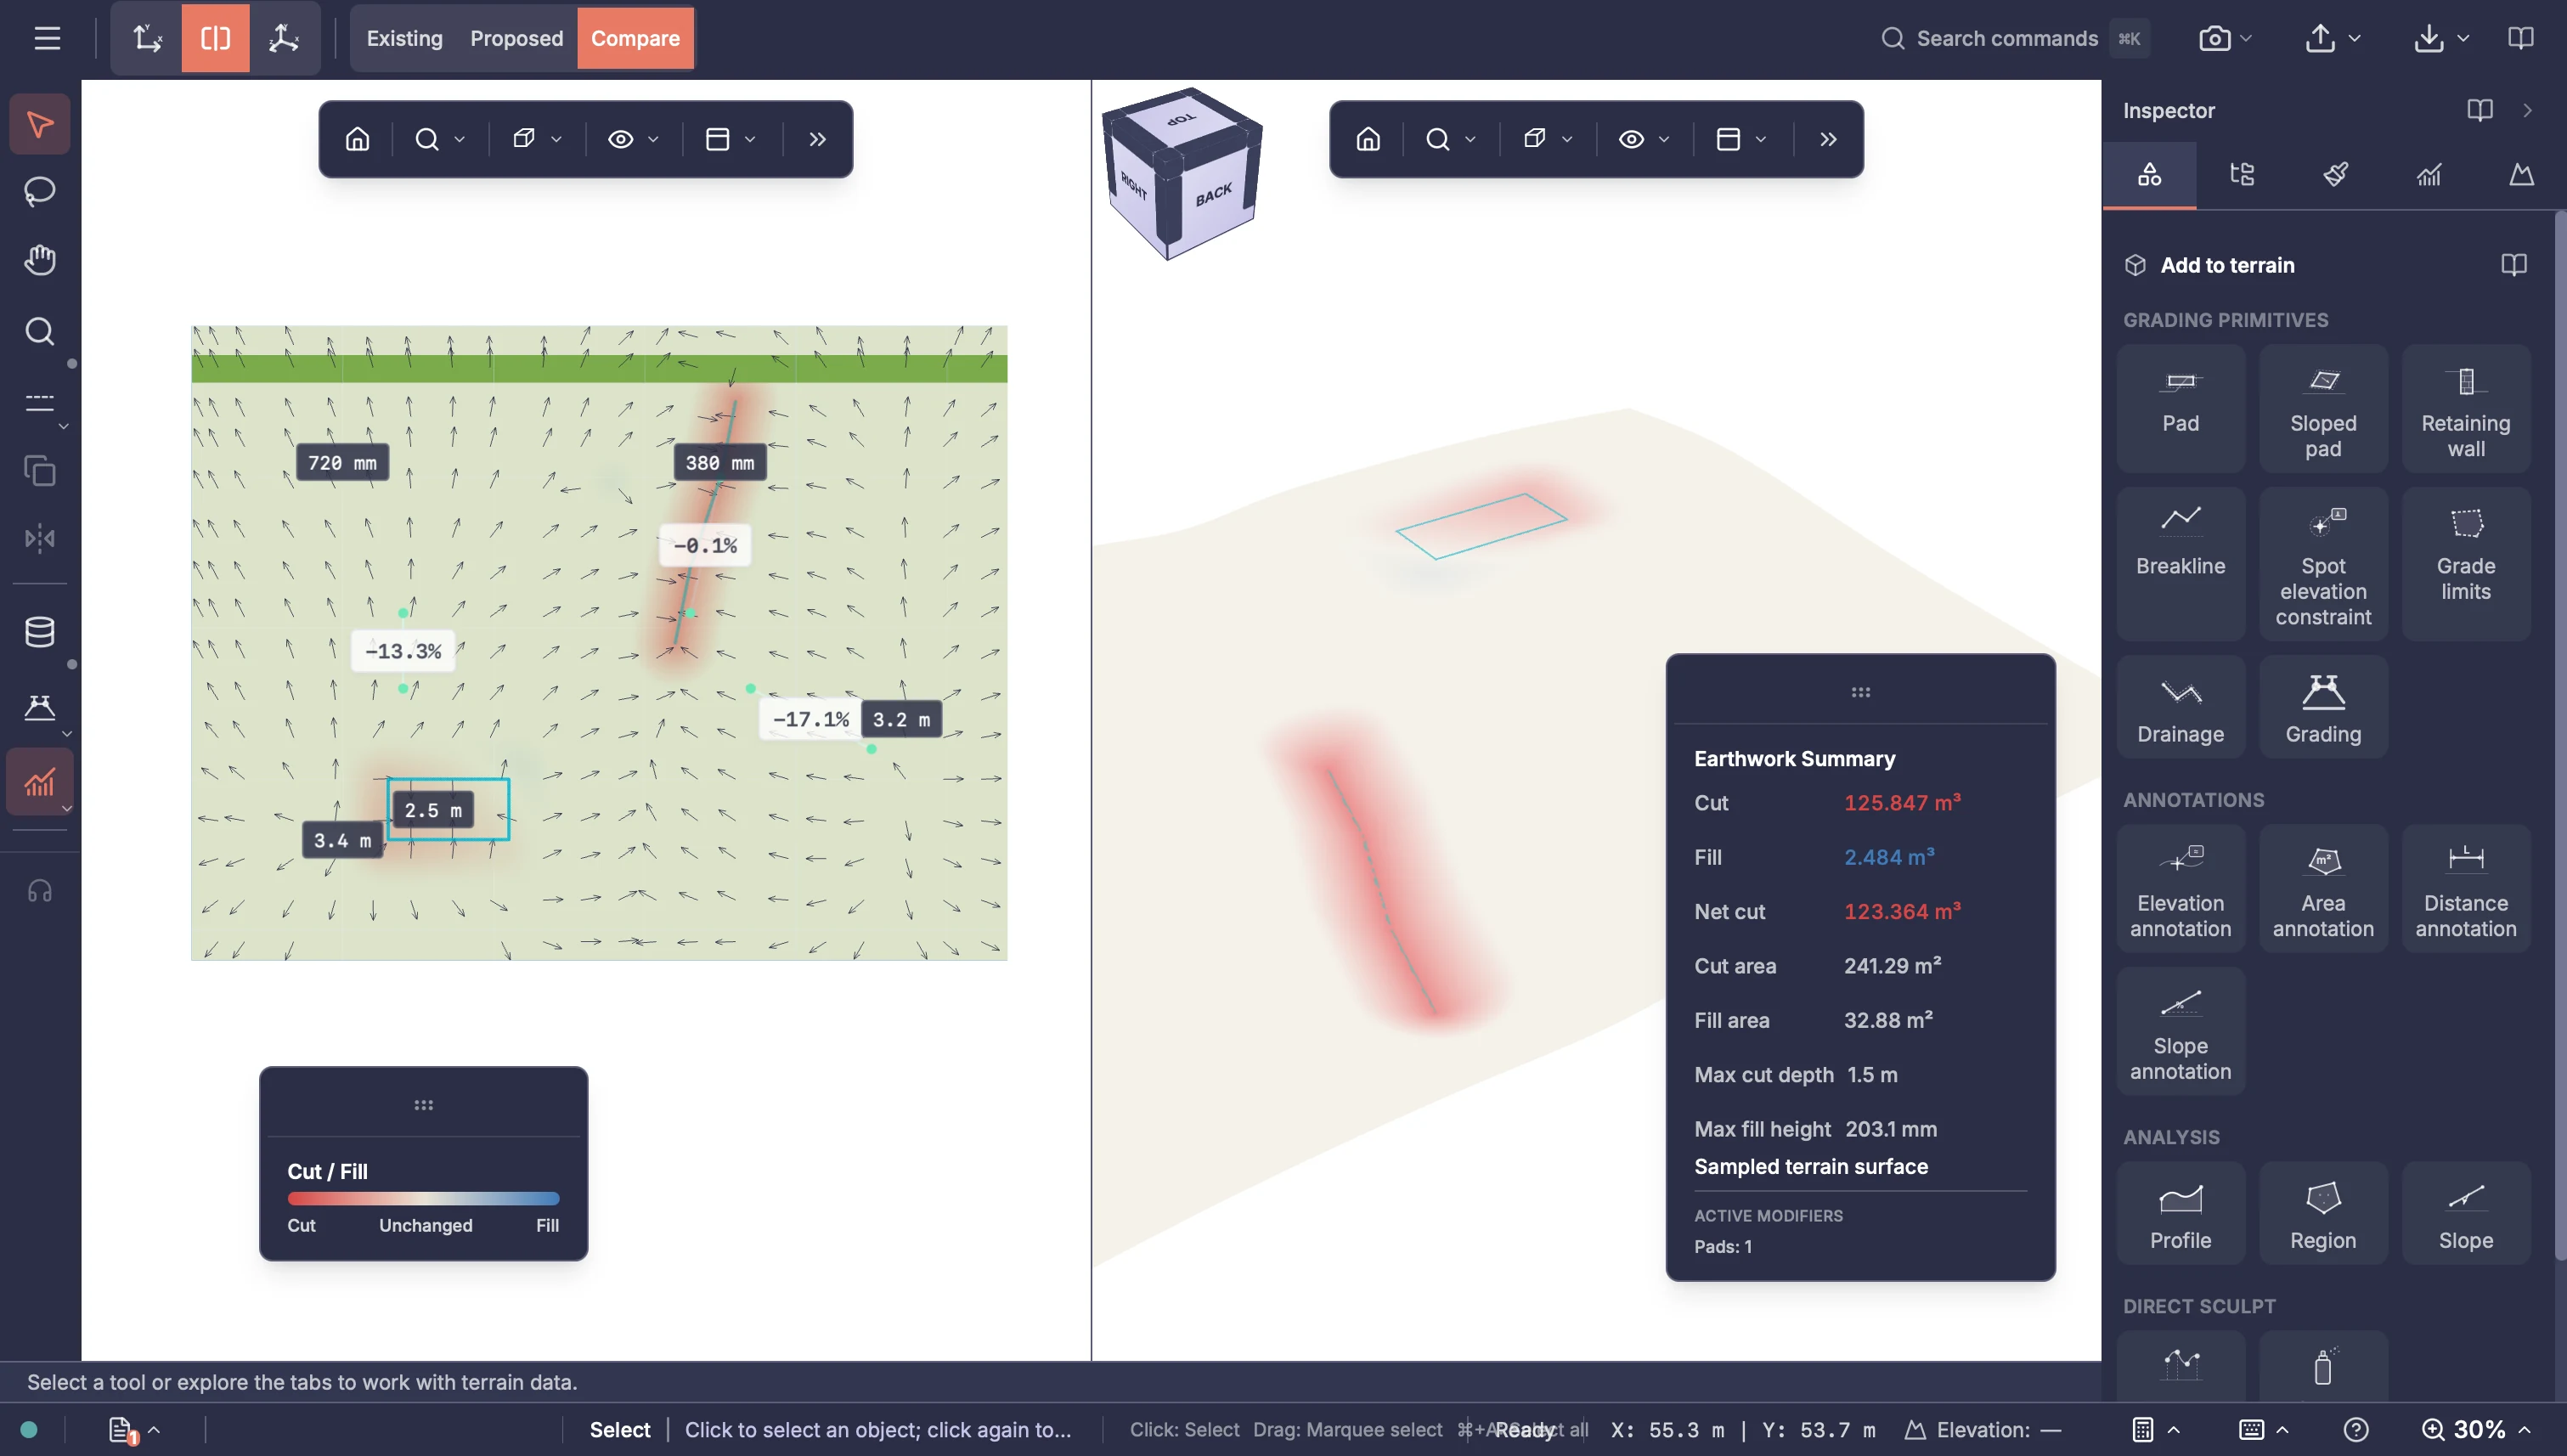
Terrain workspace showing proposed levels in 2D and textured 3D with contours, slopes and indicative runoff arrows

Integrated terrain modelling

Model existing ground and proposed garden levels

Create or import a terrain surface, refine it with constraints, grading and sculpting tools, then compare existing and proposed ground while the garden design develops.

  1. 01

    Represent existing ground

    Create or import a terrain surface from supported project information.

  2. 02

    Explore proposed levels

    Use supported constraints, grading and sculpting tools to shape the terrain.

  3. 03

    Evaluate the surface

    Review slope, cut and fill, and indicative water-runoff information where supported.

  4. 04

    Continue with the garden

    Keep planting, structures, analysis and presentation aligned with the current terrain.

Professional garden design

Why model terrain with the garden?

Understand the ground, test proposed level changes and explain a sloping garden without separating terrain from the design it supports.

Ground understanding

See what a flat drawing cannot show

Even modest level changes influence how paths meet terraces, how structures sit in the garden and how planting is experienced. When the ground is treated as a separate drawing, those relationships are harder to judge.

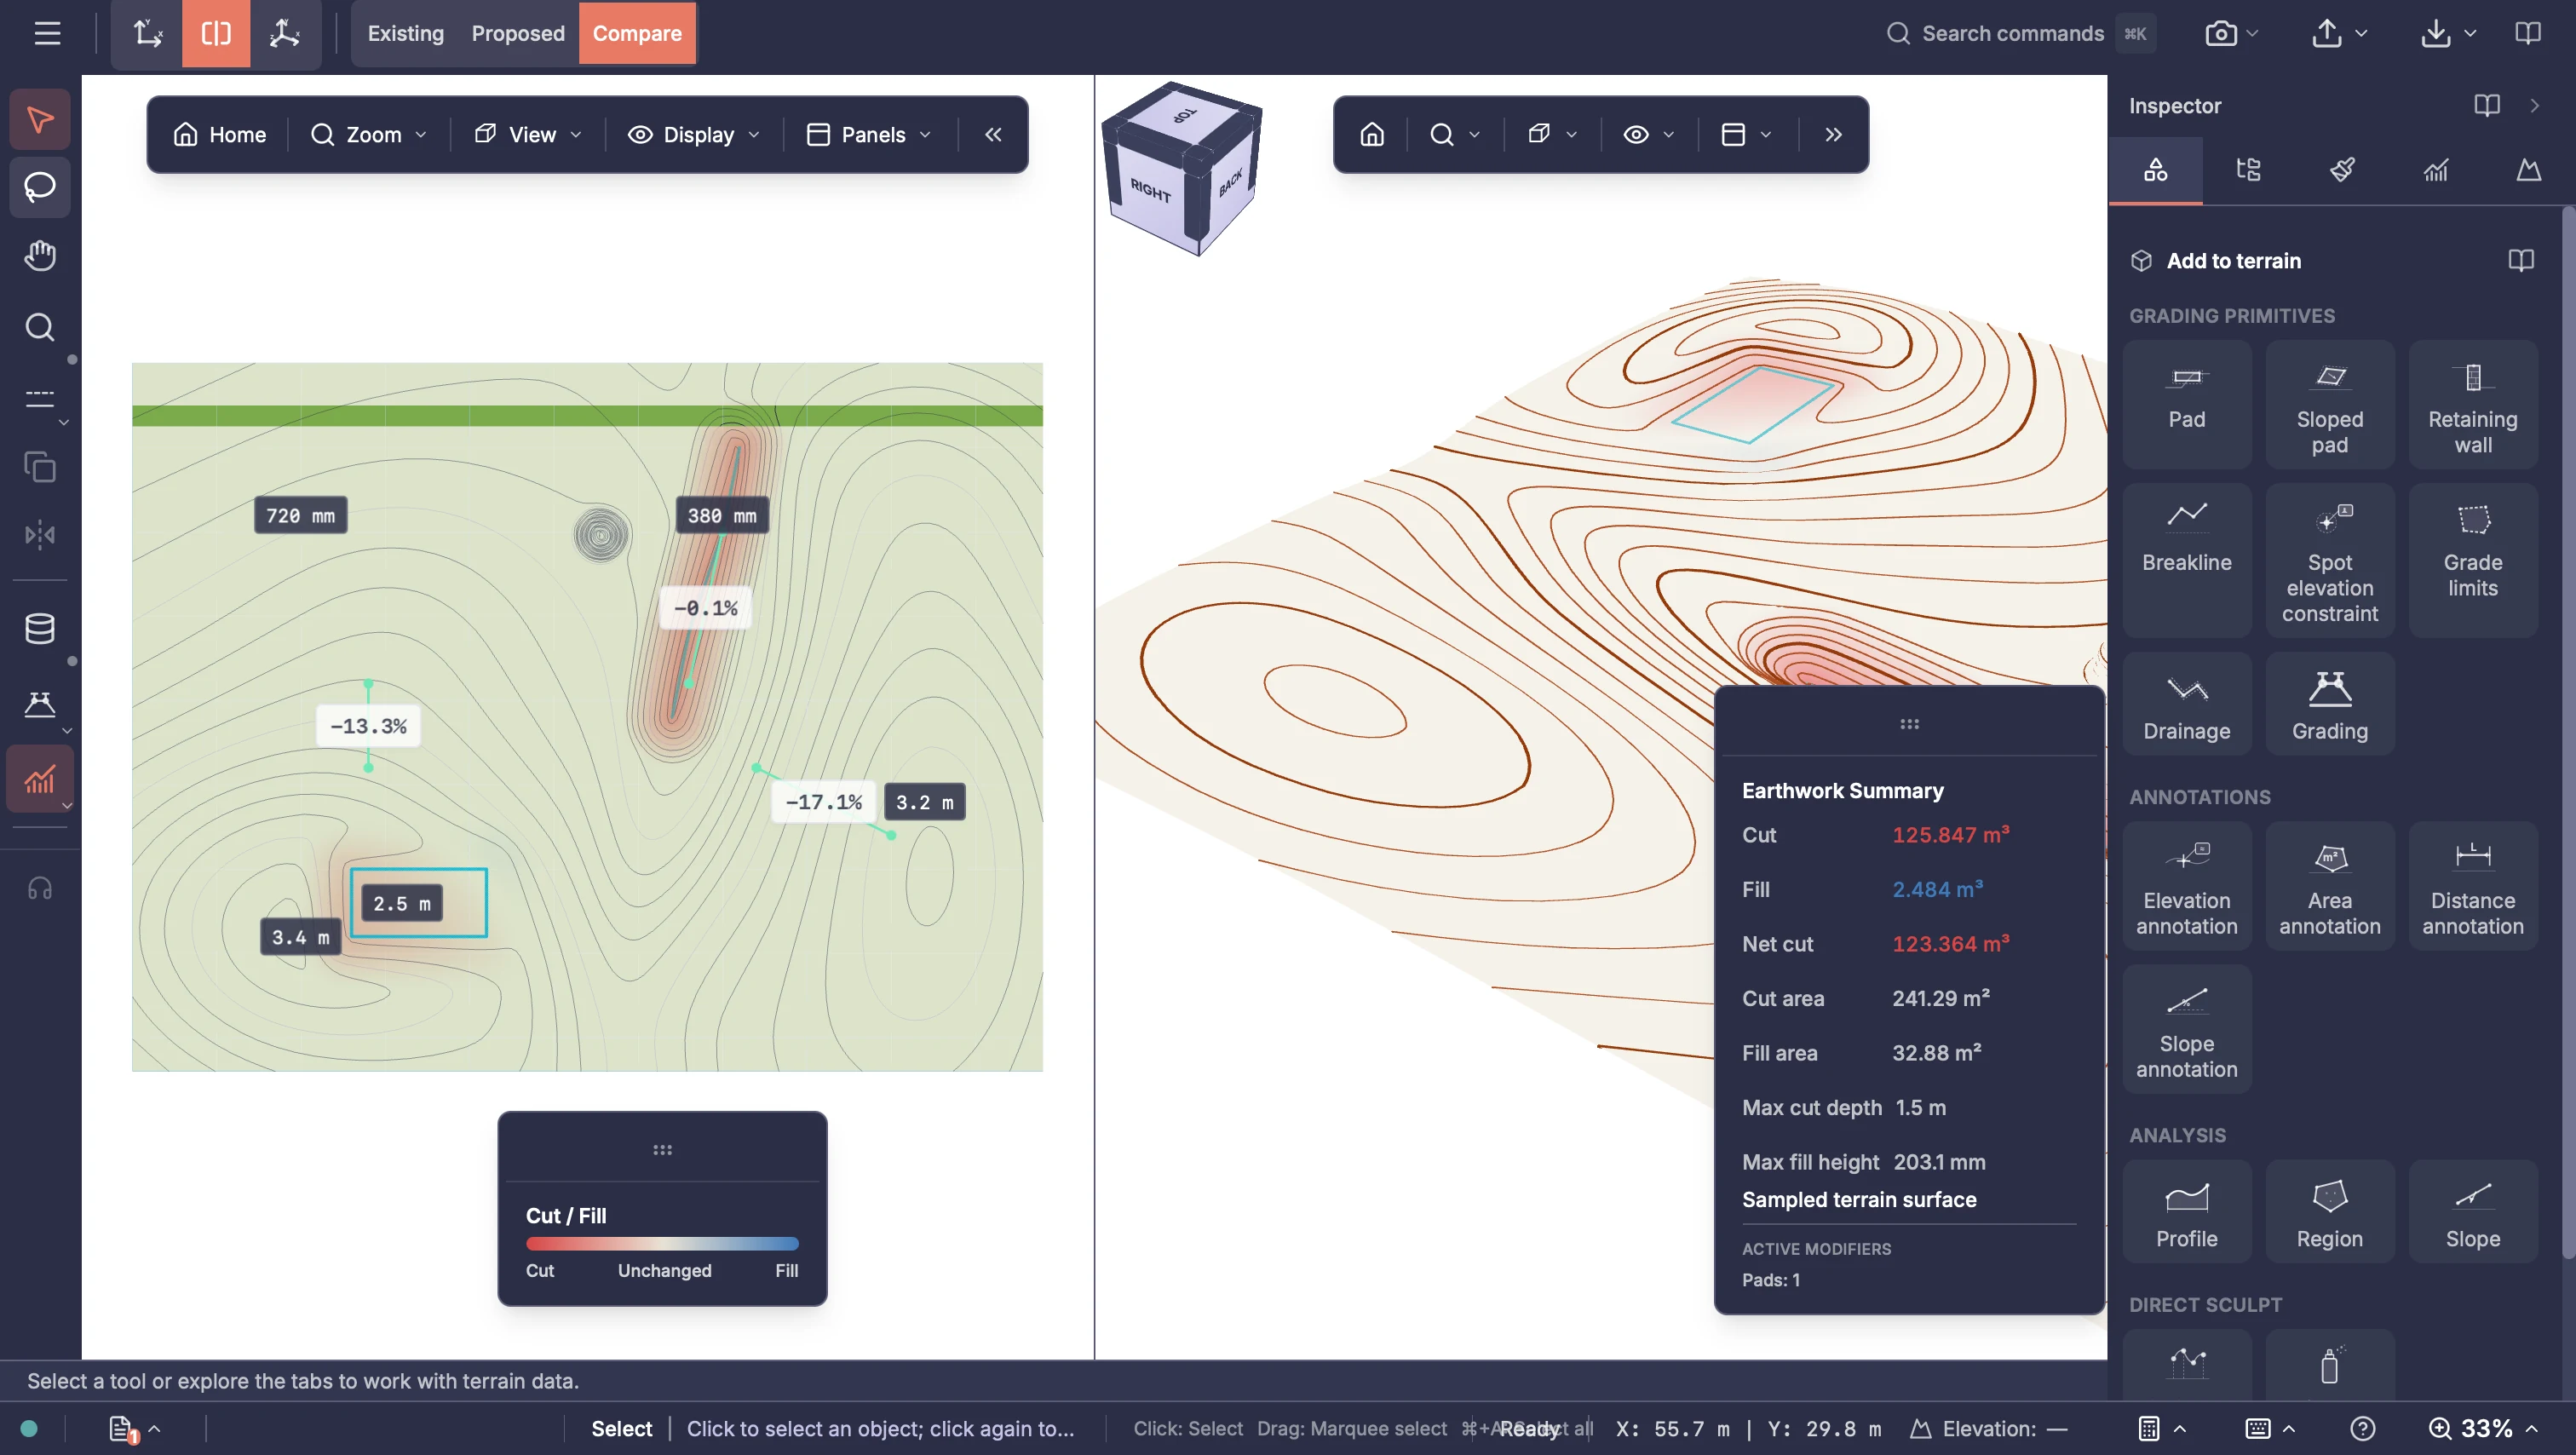
Review the terrain in 2D, split and 3D terrain views. Existing, proposed and comparison surfaces make it easier to understand the starting point and the direction being explored.

In practice

  • Start from the project terrain, create a slope, bowl or mound, or import supported elevation data
  • Move between 2D, split and 3D terrain views
  • Inspect hillshade, contours, slope and aspect
Design exploration

Test level changes while the design is still flexible

A change to one level can affect transitions, retaining ideas, drainage concepts and the amount of ground that must move. Discovering that late can force several parts of the design to be reconsidered.

Use direct sculpting and grading objects to explore alternatives in the same project. Profiles, region statistics and conceptual cut-and-fill comparisons help reveal the consequences before a design direction is fixed.

In practice

  • Shape terrain with volume points, Spray Sculpt, pads, breaklines and grade limits
  • Compare existing and proposed surfaces as the design changes
  • Review elevations, profiles, regions and conceptual cut-and-fill results

Terrain relationships

Let garden structures respond to changing ground

A sloping garden needs more than objects placed at one height. Fence panels, wall sections and deck supports must relate to the ground beneath them if the design is to be convincing and useful.

Terrain-aware wizards can follow the ground or grade a footprint, depending on the object and settings you choose. Deck supports adjust to local ground heights, while fences and walls can follow or step along slopes. Enabled terrain-aware structures regenerate when the ground changes, reducing manual adjustments.

In practice

  • Adjust deck support lengths to the ground beneath each support
  • Follow or step fences and walls along sloping ground
  • Create linked grading pads where the wizard offers ground levelling

Communication

Explain a sloping garden with more than contour lines

Clients and collaborators do not all read spot levels or contours easily. A technically useful terrain model can still be difficult to understand when it is shown in only one representation.

Combine profiles, annotations, analytical overlays and 3D views to communicate how the ground changes. Slope-based auto-texturing can also make terrain form easier to read in visual views.

In practice

  • Show terrain with contours, hillshade, slope, aspect or runoff overlays
  • Use profiles, regions and supported terrain annotations
  • Blend supported materials automatically according to terrain slope

Capability detail

Garden Terrain Modelling capabilities

Create and import terrain

Build a ground model from scratch or bring in supported terrain data to establish the site beneath the garden design.

Terrain from scratch

Set dimensions and a base elevation, then create level ground, a directional slope, a bowl or a mound.

Terrain import

Bring in supported elevation grids, contour lines, survey points, LiDAR or mesh data to establish the ground model.

Shape terrain directly

Explore proposed ground levels with editable points, sculpting and stacking tools, reviewing the shape as your ideas develop.

Volume Points

Shape supported volumes by editing point heights and slopes.

Spray Sculpt

Raise, lower and smooth supported surfaces with an interactive brush.

Stacking System

Combine supported forms with terrain using build, dig, wrap and unstack behaviour.

Grade with terrain objects

Use defined terrain objects to develop pads, slopes and level changes around the practical needs of the garden layout.

Pads and sloped pads

Create supported level or sloping grading surfaces.

Breaklines

Guide supported changes in terrain shape along an editable line.

Retaining walls

Create a supported retaining-wall terrain relationship.

Grade limits

Define the supported extent of a terrain modification.

Terrain drainage lines

Add supported drainage grading lines to terrain.

Materials and terrain relationships

Make the ground easier to read and keep supported forms related to it as you develop the design.

Slope-based terrain auto-texturing

Blend supported photorealistic material texture layers by terrain slope, with soft transitions between surface-angle bands.

Terrain-following forms

Drape or settle supported objects on the ground, and regenerate enabled terrain-aware structures as ground levels change.

Grounded planting on slopes

Plant placement samples the root-contact footprint to help keep the base embedded in sloping ground, rather than leaving the trunk floating above it.

Analyze and compare terrain

Review levels, slopes and proposed changes with terrain views and measurements that help you understand how the ground will work.

XYZ

2D, split and 3D terrain views

Move between 2D drawing, split and model views of the terrain.

Existing, proposed and compare

Review the original surface, the edited surface or both together.

Contour lines

Show lines of equal ground height, with an adjustable contour interval, to read and explain level changes.

Slope colour map

See steep and gentle areas with a colour overlay. Review slope in degrees or percent, with optional slope bands.

Slope direction map

Use an aspect colour overlay to see which direction the terrain faces.

Shaded ground relief

Adjust the light direction and intensity of hillshade to make subtle ground forms easier to read.

Elevation profiles

Draw a section through the terrain to compare elevations along its length, with distance and minimum, maximum and average elevation readouts.

Region statistics

Review supported area, elevation range and average-slope information for a selected terrain region.

Cut and fill comparison

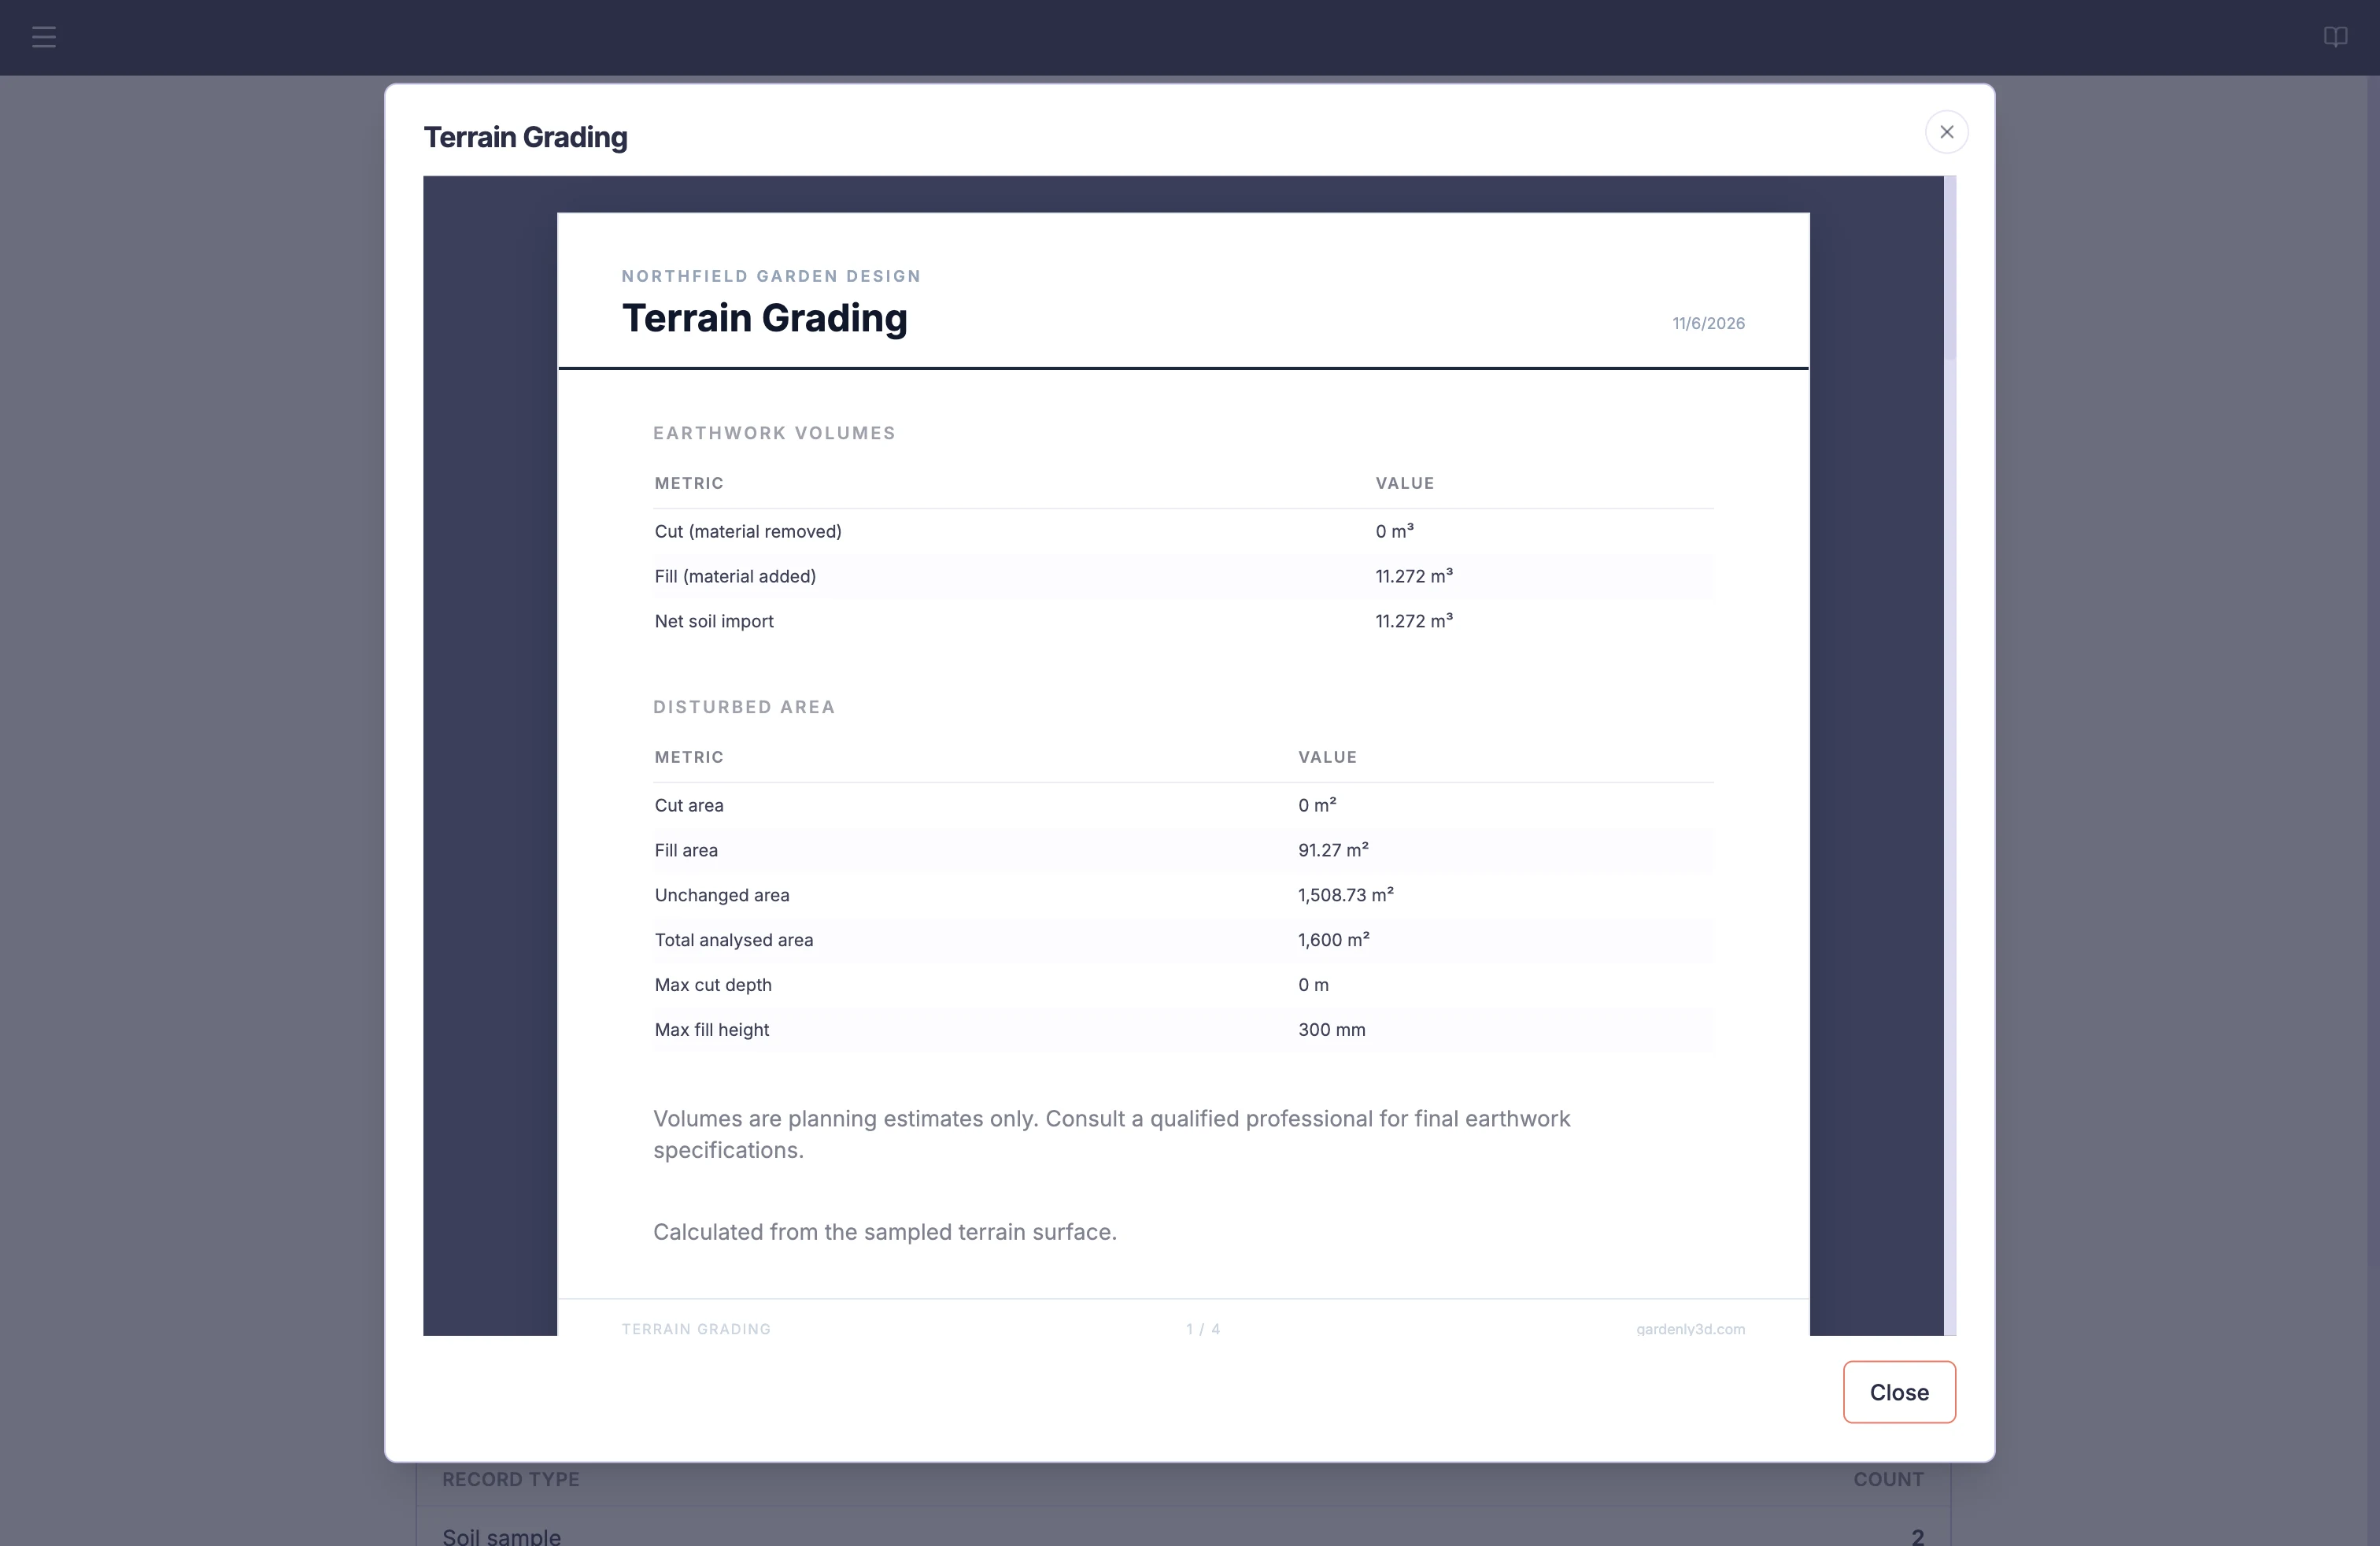
Compare conceptual cut and fill areas and volumes between existing and proposed terrain.

Runoff flow

Show arrows for indicative downhill surface flow, and review sampled depressions and potential ponding as you explore the ground. This is a design aid, not a hydraulic drainage model.

Mark levels and measurements

Explain the ground directly on the canvas with point markers and measured lines or areas.

โ‰ˆ

Height markers

Click a terrain position to place an elevation annotation.

Spot elevation constraints

Place a point and set its target elevation to guide the proposed terrain.

Slope markers

Click the terrain to place a local slope callout.

%

Slope between two points

Draw between positions to annotate the rise and fall along that direction.

L

Distance annotations

Draw a line to show a measured distance across the site.

mยฒ

Area annotations

Outline an area to show its size and review it as a terrain region.

Communicate and share

Prepare terrain reports and exports to explain the ground model and the changes you are proposing.

Useful to know

Terrain output is conceptual garden-design information. It does not replace a land survey, engineering review or specialist drainage services.

Continue exploring Gardenly3D